Diablo 4 Season 8 Character Leveling Guide: How To Fast Level 60 In The New Season? - A Step-By-Step Guide
The exciting Diablo 4 Season 8 is finally here! To be honest, this season has changed a lot compared to the previous ones. On the one hand, they have increased the difficulty of the game, especially the difficulty of challenges such as Penitent Difficulty has been greatly increased; on the other hand, XP rewards in the new season have been slightly weakened compared to Season 7.
In Season 6, it took players an average of 15 to 17 hours to reach level 60, while Season 7 took 9 hours, basically half of the former. The progress of Season 8 will be between the two, taking about 10 hours.
Therefore, we want to know how to maximize the leveling speed and how to maximize the player’s combat power to break through the higher level Torment.
Preparation
So, let’s start from the beginning. Here are some things you need to do before you really start leveling.
First, you need to create a character and make sure to choose to skip the campaign. Then, we can jump directly into the leveling stage.
It is recommended that you start with Normal difficulty first, although Normal rewards fewer XP than higher difficulties like Hard or Expert. However, the increase in difficulty and the significantly increased time required to kill each enemy is not really worth it. If you luck out and get some incredible drops during your leveling process and end up with a very powerful build earlier than you expected, you may be able to choose Hard level, depending on how things go after you enter the game.
In addition to this, you can also visit Pet tab and equip a pet to run around and pick up Diablo 4 Gold and materials for you, saving you time.
It is worth noting that before you continue to advance any content, you need to talk to your Mercenaries immediately, unlock and equip one. This way, you have a companion to help you as you progress.
Levels 1 To 15
Now, let’s talk about how to start actually leveling up in Kyovashad. You actually need to start Raising Spirits Side Quest by talking to a guard on the north side of town. Within seconds, you will be cheering next to the guard and handing in the quest. This will give you a bunch of herbs, which saves you the time of having to collect them in the world yourself. However, Elixirs currently for sale in iGMeet do the same thing, allowing you to skip the time of gathering these materials.
Now, when you are ready, you will have a bunch of herbs to make Elixirs, which will increase your XP gain by 5% for the entire duration.
Otherwise, we will follow the opening quest of the new season questline, which can also be found by the new NPC in Kyovashad. We will advance to a certain stage until you make your first bottle of Tier 1 Elixir after reaching level 10. Then from then on, Elixir is always effective.
Remember, Elixir comes in two levels: basic and advanced. Basic elixirs increase your XP gain by 5%, while advanced elixirs increase your XP gain by 8%, but this is not available until level 50.
So once you reach level 50, you can start making and using these elixirs. But before that, you can’t use them. If you are wondering what elixirs you should make ahead of time, please note that the quantity does not really matter, because different classes and builds have different requirements for elixirs.
Also, another very important aspect of this season is the new Season Journey, which has changed drastically because Season Blessings have been moved to Season Journey. Previously, they were in the Battle Pass, and you needed to play the game to win Favors, and eventually you could get Season Blessings to increase XP.
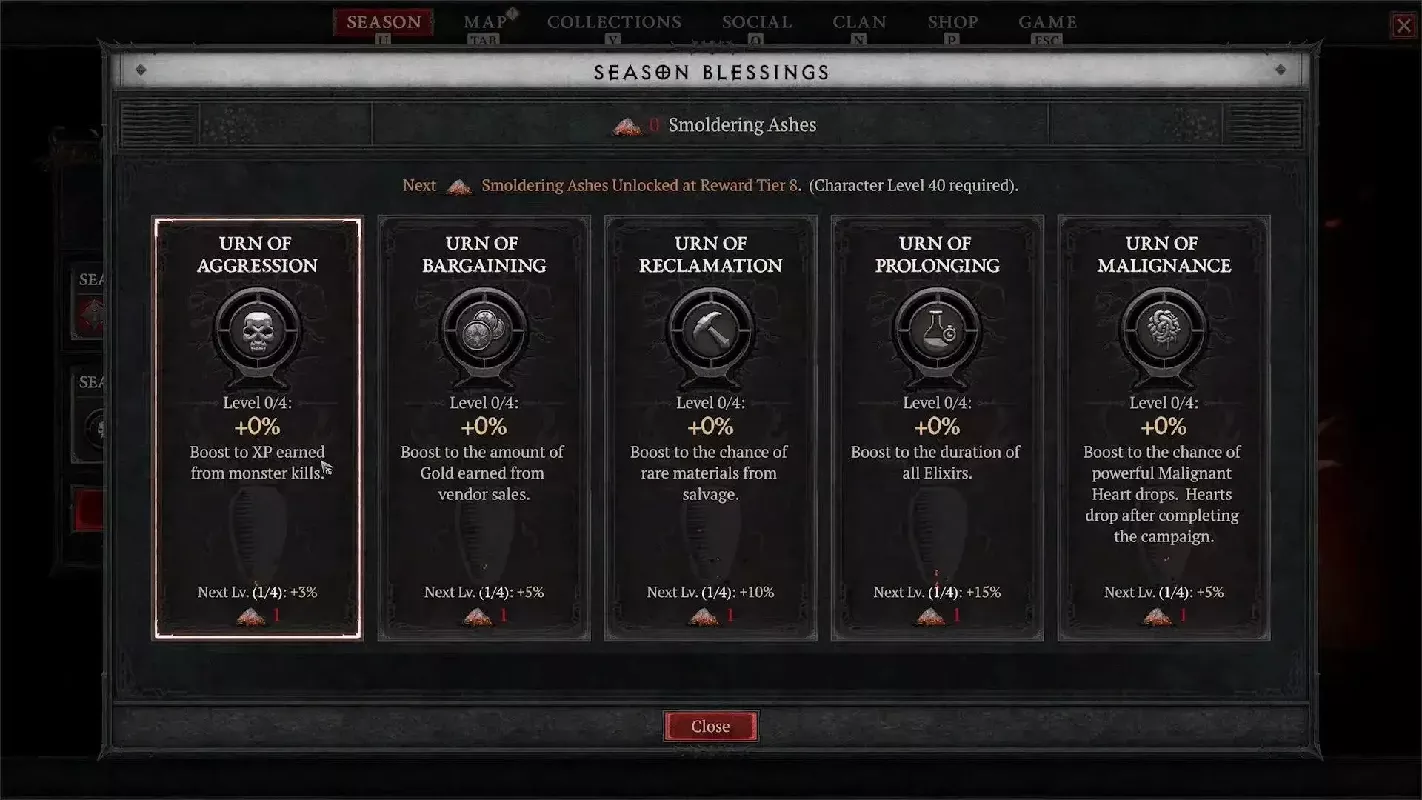
But now you can get or enhance other season rewards, all of which are in Season Journey. So Season 8 wants you to pay more attention to your Season Journey and complete it as soon as possible, because every time you have a chance to complete any of these goals, the rewards will be more generous, which will make your character better in the long run.
On the other hand, the new Battle Pass is not as important in terms of equipment and character development. You can choose your rewards and develop them in a different order, but it is not important for character leveling.
Levels 15 To 50
But you don’t have to worry too much, because since you reach level 15, class quests are no longer a problem. Just like we encountered since Season 7, you don’t actually need to do them anymore.
Once you hit level 15, you’ll automatically unlock the passives, assuming you’ve done the class quest before. Then you just need to make sure to open your class passives page, like checking your Book of the Dead or something, to activate those new skills that just opened up.
Technically, you can still complete the class quest again, and you’ll be rewarded with a special chest that gives you some specific items to help you complete your builds. This is great, but will it be worth spending more time completing them when you understand the actual power of these gear in higher-level content? Probably not at this time.
Now that you have a basic build configuration and your class passives unlocked, it’s time to increase the difficulty level to increase your XP drop rate. Remember, you can only do this if you kill all enemies effortlessly, if it takes you several seconds to kill anything, then maybe adjusting the difficulty too high is not a good thing for you.
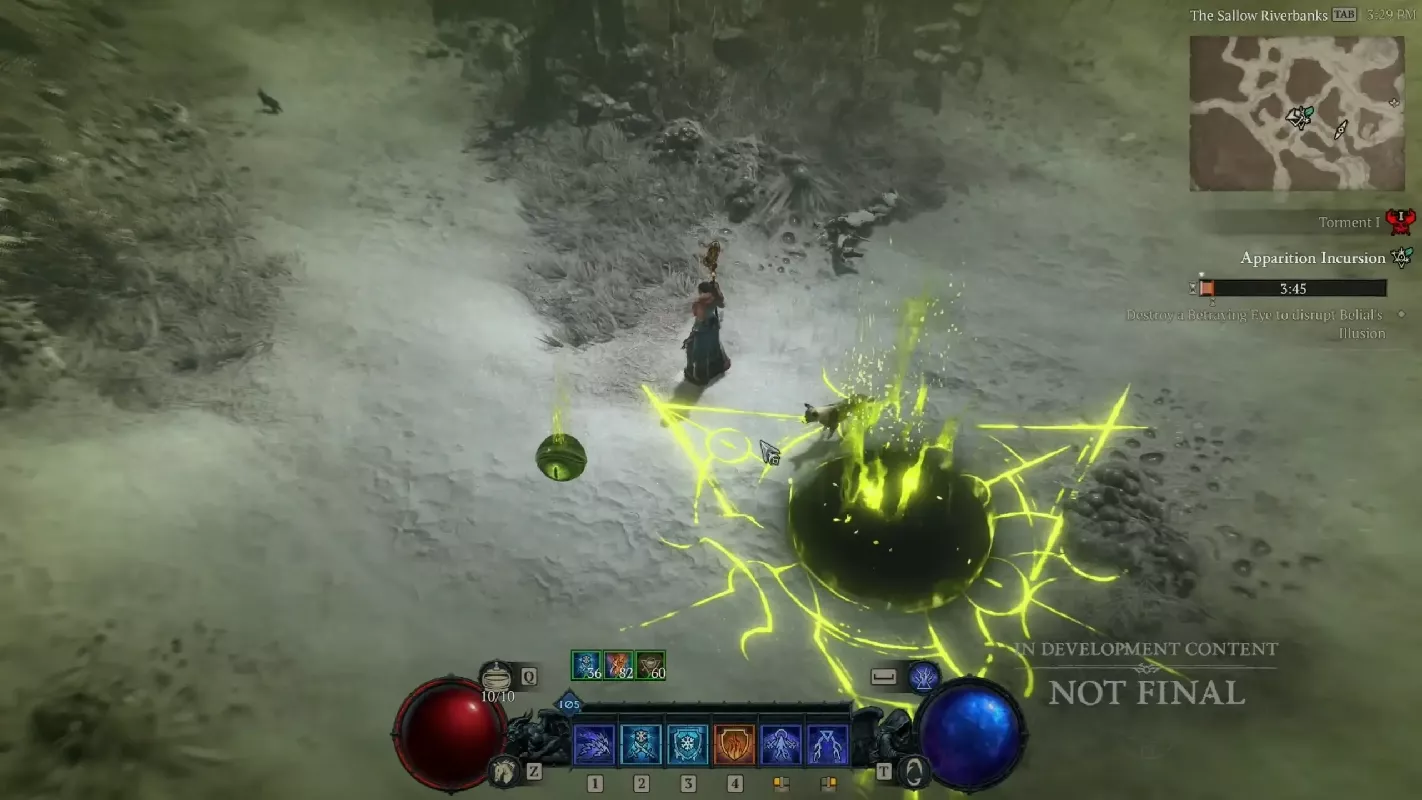
Next, we can just continue with the seasonal quest line, focusing on Apparition Incursions as much as possible. If you want to maintain a consistent and efficient XP farming rhythm, then replace it with Helltide events when the limited-time Incursions are not available, where there will be a lot of high-quality resources.
Levels 50 To 60
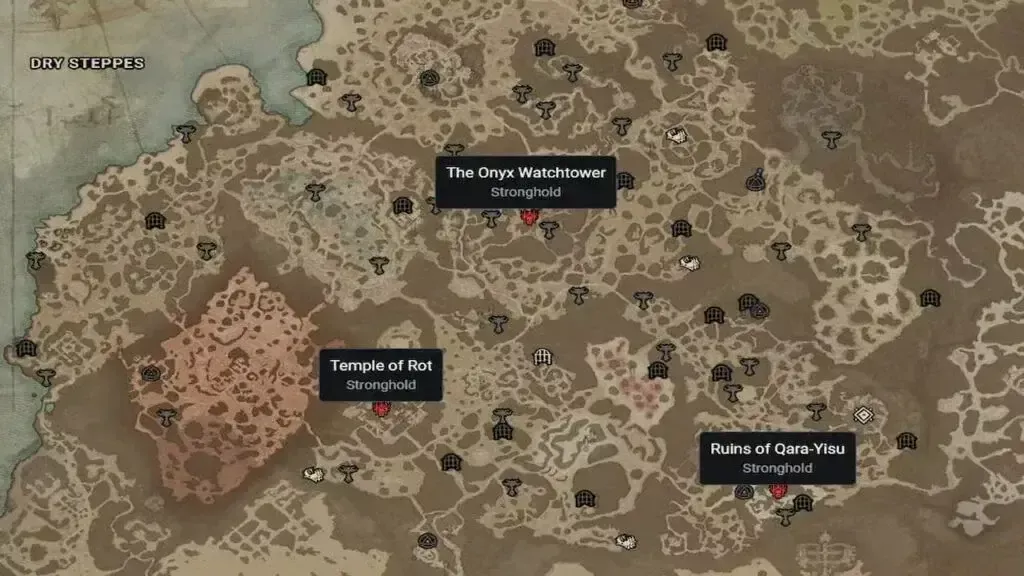
We need to do this until level 50, and then clean up Strongholds on Normal difficulty as usual. Since these Strongholds will provide the same XP as the final reward no matter what difficulty you are in, there is no need to choose a harder difficulty. You might as well choose Normal difficulty so that you can maximize your time.
Note that you need to move back and forth between all Strongholds on the map during this period, which will help you maximize the efficiency of farming XP.
In addition to the most difficult Strongholds, you can also continue to do Apparition Incursions and Helltide. But I still want to emphasize the value of dungeon XP farming. Because if you find Tributes with relevant perks during the leveling process, it will become an important source of Masterworking materials, crafting materials, and specific equipment drops, which can greatly improve your leveling efficiency.
When you are almost at level 60, or at level 60, it’s time to prepare for Torment 1. You need to change the difficulty to Penitent and upgrade your equipment. It’s time to prepare for the endgame!
Anyway, this is my overview of how to effectively and efficiently advance your character leveling progress in Diablo 4 Season 8. But reaching the level cap does not mean the end of the challenge. On the contrary, it is the signal that the game is fully started and you can freely enjoy all the features and mechanics and start your adventure in the dangerous time of Sanctuary.
Apr-29-2025
-

Diablo 4 Season 7 Necromanc ...
In the various builds of Diablo 4, players can often see that Aspects play an important role. Legendary Aspects can upgrade rare items to legendary items, bringing powerful enhancements to the player’s character. In the seventh season of Diablo 4, Necromancer performed very well. Whether it is against bosses or farming Diablo 4 Gold, Necromancer is easy and efficient. And a complete Necromancer build also requires specific Aspects. Here is how to get Necromancer Aspects. How To Get Aspects? Legendary Aspects will not fall from the sky. Generally speaking, there are two ways to get Legendary Aspects, one is Codex of Power, and the other is Legendary items. Codex Of Power Codex of Power is a collection of Aspects. You can engrave it on your rare or legendary equipment in The Occultist. You can unlock more Legendary Aspects by clearing dungeons. However, Codex of Power does not include Legendary Aspects available in the game. Some truly unique Aspects can only be obtained through other means. Legendary Items Legendary weapons have a chance to drop from demons or farming enemies. Legendary items contain Legendary Aspects, which can then be extracted from Legendary items at The Occultis and placed on other Legendary items. Aspects Categories Aspects can provide powerful properties to items, but they cannot be placed on items at will. Each piece of equipment has a specific slot for Aspects, and the bonuses provided by Aspects vary from item to item. Some Aspects can give a character 100% bonus on a two-handed weapon, but only 50% of the effect on an amulet, so players must be careful when choosing Aspects for their equipment. Here are the categories of Aspects: Offensive Aspects: Can be engraved on one-handed weapons, two-handed weapons, gloves, rings or amulets. Defensive Aspects: Can be engraved on pants, shields, helmets, breastplates and amulets. Resource Aspects: Usually can only be engraved on rings. Utility Aspects: Similar to Defensive Aspects, can also be engraved on amulets, breastplates, boots, gloves and helmets. Mobility Aspects: Can only be engraved on amulets and shoes. Necromancer Aspects There are many Aspects suitable for Necromancers. It is worth mentioning that some Aspects are limited to classes. For example, some Aspects say that they are limited to Sorcerer, but they are completely ineffective for Necromancers. You can still use them on your equipment or weapons, but they will not have any effect. The important way to unlock Aspects is to explore dungeons. When you clear dungeons, you can not only get Diablo 4 Gold and equipment but also have the opportunity to unlock various Aspects. The following introduces Necromancer Aspects that you can unlock in the dungeons of each map. Some of them are limited to Necromancer, while others are available to all classes. In any case, they are all Aspects that Necromancer can use. Learn More: What Can We Expect In Diablo 4 Season 8? - Release Time, Theme & Gameplay Fractured Peaks Aspect of Plunging Darkness: In Rimescar Cavern, Offensive Aspects Aspect of the Protector: In Lost Archives, Defensive Aspects Aspect of Torment: In Black Asylum, Resource Aspects Blood Seeker’s Aspect: In Mercy’s Reach, Offensive Aspects Blood-bathed Aspect: In Hoarfrost Demise, Offensive Aspects Eluding Aspect: In Caldera Gate, Utility Aspects Flesh-Rending Aspect: In Nostrava Deepwood, Resource Aspects Dry Steppes Aspect of Bursting Bones: In Path of the Blind, Offensive Aspects Aspect of Might: In Dark Ravine, Defensive Aspects Aspect of Potent Blood: In Betrayer’s Row, Resource Aspects Aspect of the Umbral: In Champion’s Demise, Resource Aspects Rapid Aspect: In Buried Halls, Offensive Aspects Splintering Aspect: In Guulrahn Slums, Offensive Aspects Scosglen Aspect of Empowering Reaper: In Flooded Depths, Offensive Aspects Aspect of Inner Calm: In Raethwind Wilds, Offensive Aspects Aspect of Reanimation: In Aldurwood, Offensive Aspects Aspect of Swelling Curse: In Hive, Offensive Aspects Aspect of the Expectant: In Underroot, Offensive Aspects Edgemaster’s Aspect: In Oldstones, Offensive Aspects Ghostwalker Aspect: In Broken Bulwark, Mobility Aspects Requiem Aspect: In the Vault of the Forsaken, Resource Aspects Hawezar Aspect of Shared Misery: In Oblivion, Utility Aspects Aspect of the Deflecting Barrier: In Lost Keep, Defensive Aspects Blighted Aspect: In Akkhan’s Grasp, Offensive Aspects Fastblood Aspect: In Iron Hold, Resource Aspects Sacrificial Aspects: In Ruins of Eridu, Offensive Aspects Unyielding Commander’s Aspect: In Faceless Shrine, Offensive Aspects Kehjistan Aspect of Disobedience: In Halls of the Damned, Defensive Aspects Aspect of Grasping Veins: In Corrupted Grotto, Offensive Aspects Aspect of Retribution: In Abandoned Mineworks, Offensive Aspects Aspect of the Damned: In Uldur’s Cave, Offensive Aspects Hulking Aspect: In Sepulcher of the Forsworn, Resource Aspects Needleflare Aspect: In Yshari Sanctum, Offensive Aspects Torturous Aspect: In Deserted Underpass, Utility Aspects Wind Striker Aspect: In Shivta Ruins, Mobility Aspects The above Aspects are not all Aspects of Necromancer, which could be farmed in these areas. There are also many Legendary Aspects that are not included. Since there are too many dungeons in Diablo 4, players may not have explored all of them. Therefore, when you lack Aspects suitable for Necromancer, you can try to sweep these areas. As the main game content of Diablo 4, exploring dungeons can bring you too many rewards. In the process of farming Aspects, you will naturally accumulate some equipment and gold, which are very useful for your creation of a better Necromancer.Feb-24-2025
-

Diablo 4 Season 7 Quake-HOT ...
The exciting Diablo 4 Season 7 has finally arrived. Are you ready to face all the challenges and threats brought by the new season? In addition to the necessary consumables such as sufficient gold coins and items, a qualified construction plan is also a necessary preparation for starting a new season journey. Here, we will start to introduce a Quake-HOTA Barbarian Build that is very powerful in Season 7 in the future. The core of this build is the new Chest Armor, which allows us to make Earthquakes explode through Hammer of the Ancients. As early as on PTR, we can clearly feel that the damage potential of Earthquake in the new season is slightly higher than HOTA itself, so this build is also more focused on Earthquake damage. However, with the new body armor and gloves, you can also reach a Hammer of the Ancients skill level of more than 50 points. So it also has a variant that focuses on HOTA damage, and in theory you can even try to create a balanced combination of the two. How to build it depends on your game style. Skill Tree Let’s start with the skill tree. First, HOTA and Whirlwind, one point each. Damage scaling is crucial for Hammer of the Ancients, as it increases all the damage we deal, and overpower hits will happen quite often. Alternatively, we can also take the passive skill below, Warpath, and use Iron Skin as our only defensive skill, which will provide additional damage reduction and make Aspect of the Iron Warrior unstoppable. Then we have War Cry and Leap, each Leap will generate additional Earthquakes. And Aggressive Resistance will provide some nice protection. Since we will always apply Berserking in Weapon Mastery Cluster, it has very good synergy with some of the passive skills at the bottom of the skill tree to increase our Earthquakes damage. Finally, we also need Key Passive, Unconstrained. For the pure HOTA variant, maximizing HOTA effect is of course a no-brainer, and at the same time, we also need to invest 3 points each in Heavy Handed and Brute Force. For both variants, we choose Two-Handed Axe Mastery and use a one-handed weapon to perform all other attacks except Hammer of the Ancients. Paragon Board Next, let’s look at Paragon Board system. For the starter board, we chose Challenger Glyph. Here we have a weapon aspect that increases our Earthquake damage proportional to our Strength value. So we want to stack as much as possible on Paragon system and equipment. On equipment, Force Of Nature is a must-have for an Earthquake build. So for Legendary nodes, we stack damage to close enemies on equipment. Meanwhile, on this board, we also light Dominate for continuous powerful attacks. Next up is the classic Blood Rage Dominate board. Like we said before, we also continuously stack Berserking, so we can get a double damage bonus here. In addition, there is Paragon Glyph, Rumble, which is the most important Glyph regarding Earthquake damage, so there are a lot of Strength nodes on this board to maximize its effect. Then there is Decimator board, which also provides a solid damage bonus, depending on whether we need more Berserking damage or damage to close enemies. The last board is Bone Breaker, which provides an additional vigorous attack, which will not only increase our damage but also generate additional Earthquake on this board. However, since we already use Exploit Glyph for a pure HOTA build and want to use Weapons Master board with Crusher and Wrath Glyph, we will abandon Force Of Nature and the last two glyphs. Equipment For the necessary equipment required for this build, the first thing we mention must be Ugly Bastard Helm. Because it converts all our direct damage into fire damage and then provides a significant bonus to all our fire damage. In addition, the new Mantle of the Mountain’s Fury is also a good unique Chest Armor choice. Because we always want a higher chance to deal double Earthquake damage, and the unique item effect causes Earthquake to explode, dealing all the damage in one burst. That’s why we definitely want to increase Earthquake duration, because longer duration means more damage from the explosion. For gloves, we used Earthstriker’s Runic Gloves. To be honest, HotA rank isn’t as important as the extra Strength and Temper here. So we prefer to choose a gear that deals more damage to close enemies and has more Earthquake size. Of course, you can definitely choose other gear, depending on how much Diablo 4 Gold you have. Then we equipped Aspect of the Iron Warrior on the pants, and Temper determines Earthquake size and Iron Skin cooldown. Additionally, since we need Fury per second to make sure our resource management works on Amulets, we use Aspect of Bul-Kathos, which makes our Leap generate additional Earthquakes and provides additional damage reduction when standing in an Earthquake. New Patch Buffs Thanks to the new patch, we also get a powerful damage multiplier that scales with Strength stat. So that’s why we stack so much Strength to easily reach over 1,000% damage bonus. Of course, Temper to maintain the duration of Earthquake and damage to melee enemies are also important. Items Needed For Pure HOTA Variant For the pure HOTA variant, we want to add as many ranks as possible, so we have different priorities here. For equipment, we chose Banished Lord’s Talisman, Ring of Starless Skies, and Ring of Red Furor. In the meantime, because we also want to stack strength and critical strike damage here, different weapons are also needed. You can add Grandfather Unique Two-Handed Sword to this setup, insert Runewords into the armor pieces, and fill the weapon with red gems to deal more overwhelming damage. If you need more good equipment to optimize your build, then you might want to follow iGMeet Discord, where some giveaways from time to time may allow you to get some free resources. Final Thoughts In short, the above is all for this guide. Because this build has only been tested on Season 7 PTR so far and still needs to be patched and optimized, Quake-HOTA Barbarian Build you use must be much stronger than what you see so far, and you can customize it to your play style. However, keep in mind that when playing this build, the biggest damage comes from Earthquake, otherwise you can also try pure HOTA Barbarian, which is also fun and should be able to run high-level Pit. Let’s look forward to this build making Barbarian class shine in the new season!Jan-20-2025
-

Diablo 4 Season 6: How To U ...
As a new class born from DLC Vessel of Hatred, Spiritborn is stronger than the general class even in Season 6. As a shaman warrior, Spiritborn is actually the evolution of Witch Doctor class in the early Diablo series. Because it is a new class, the number of builds available for Spiritborn is not as many as other classes in Diablo 4 Season 6. But as the entire Spiritborn class is becoming more and more perfect, the related builds are also increasing, and in Season 6, you will find a Spiritborn build that is suitable for both PVE and PVP. Based on this, we will introduce this build - Quill Volley Eagle Build, and how to use it in PVE and PVP modes, respectively. Quill Volley Eagle Build In PVE Currently, the best PVE Spiritborn build in Season 6 is Quill Volley Eagle Build. Although this build is likely to be weakened in Season 7, Quill Volley Eagle Build will still be your first choice for combat as a Spiritborn for a long time before then. How To Allocate The Required Skills? If you often play MMORPG, you will know that the foundation of any powerful build is inseparable from the skills available to the corresponding class, and Quill Volley Eagle Build is no exception. Based on this, we recommend that you allocate the required points to the active and passive skills of this build according to the following: Active skills: Rock Splitter-Enhanced: 5 Quill Volley-Enhanced, Advantageous: 5 Ravager-Enhanced, Measured: 1 Armored Hide-Enhanced, Reinforced: 1 Counterattack-Enhanced, Reinforced: 1 Scourge-Enhanced, Adaptable: 1 The Hunger-Harmonious, Exalted: 5 Passive skills: Vigorous: 2 Balanced Exertion: 3 Mirage: 1 Unrestrained Power: 3 Focal Point: 1 Apex: 3 Endurance: 1 Perseverance: 3 If you are a returning player from Season 6, you may get Diablo 4 Gold and skill points through your Renown, or directly upgrade to level 50 from the beginning. But if you’re new, you’ll need to start from scratch and work your way up. Fortunately, with Diablo 4 Season 6 update, you’ll be able to reach level 50 very quickly. Of course, you may find yourself needing to choose other skills to progress through the skill tree. As long as you’re capable, you can reconsider the skills included in Quill Volley Eagle Build and create a custom Quill Volley Eagle Build that better suits your personal needs. How To Rotate Skills? After selecting the skills you want, you’ll need to cast them in the following order to fully utilize the effects of these skills: Scourge Ravager Quill Volley Counterattack The Hunter Armored Hide Using Scourge first allows you to apply poison damage, fear, and slow down enemies. Activating Ravager next increases your overall damage output. Then, follow up with the core skill Quill Volley to pierce enemies, and hitting at least 3 feathers will make them vulnerable, allowing you to deal more damage. As enemies get close, remember to use Counterattack to dodge their attacks and counterattack. You’ll then be able to deal bonus critical damage to each nearby enemy. Then unleash The Hunter for heavy area damage to weak or elite targets. Finally, if you’re overwhelmed by a more troublesome foe, pop up Armored Hide to increase your block chance and reduce the damage you take. Best Spirit Hall Spirit Hall is an important and unique combat benefit mechanic for Spiritborn class, so choosing the best Spirit Hall will help you a lot with your Quill Volley Eagle Build. We recommend you choose Jaguar as your Primary Spirit animal at level 15, and Gorilla as a secondary option. This will ensure that your damage output and resolve are always enhanced in actual combat. Jaguar-All Jaguar attacks: Jaguar skill damage increases Gorilla-Resolve: Damage Reduction Best Mercenary As one of the new mechanics, your Quill Volley Eagle Build will do more with less effort in combat if you can choose the right mercenary combination. For this reason, we first recommend that you choose Varyana as your first mercenary. Because Varyana performs well in dense mob areas, this makes her a powerful helper to help you fight against large groups of enemies. As you kill enemies quickly, Varyana will also become stronger, which is perfect for the fast-paced combat brought by Quill Volley Eagle. You can then choose Raheir as your reinforcement mercenary. If you are caught by mobs, his defense buff will help you survive. He can also deal considerable damage to enemies. After all, he is a Barbarian. Quill Volley Eagle Build In PVP In fact, Eagle Quill Volley Build is not only outstanding in PVE mode but also difficult to match other Spiritborn builds in PVP mode, and it is even suitable for end-game. This is not surprising, because there is often overlap between end-game and PVP in Diablo 4 series of games. You can also keep the items and skills obtained for Quill Volley Eagle’s end-game. The reason this build works in PVP is that Quill Volley’s shotgun feathers hit hard, whether you are facing a team of players or a single opponent. Rebound allows you to trigger up to 20 hits in a single attack, making it difficult for all enemies to dodge. Although this build may be nerfed in Season 7 in the near future, it must be admitted that it has its own characteristics that make it useful in both PVE and PVP, so it is worth your try. In addition, If you are missing game props to help build this build, you can enter iGMeet Discord now, the game giveaways information posted here regularly should help you. Good luck!Dec-04-2024
-

Diablo 4 DLC: Which Bosses ...
Diablo 4 Vessel of Hatred DLC introduces a ton of enemies to defeat and loot to collect, and the roster of all-new bosses can demonstrate this point. No matter what class you have chosen, be it the debut Spiritborn or one of five previous classes, these overwhelming bosses serve as the ultimate test for your builds as you pushing forward the brand new campaign in the region of Nahantu in Sanctuary. This guide details each boss that is exclusive to Diablo 4 Vessel of Hatred, along with the specific location that they nestle. Enkindled Judicator Enkindled Judicator serves as the first boss appearing in “Pursuit of Justice” main mission. It shows up in the burning ruins of Windswept Cabinas as bulking soldier. The primary weapon of this rookie boss is a big hammer. It’s slow to swing, but it hits hard. Also, watch out for its fire attack. Overall, it’s pretty easy to deal with. Abhorrent Manifestation Just like what its name has disclosed, this boss is designed as a terrifying horror. You will encounter it during “Enmity Rising” mission as you trespass Hollows part. Abhorrent Manifestation is primarily good at melee attacks. While it does less damage overall, it is noticeable that it is available to summon Minion Hollows for help. Nangari Deathworker You are gonna to meet Nangari Deathworker as you progress the quest of “Thrust into the Dark”. It features a giant Nangari, so it undoubtably excels in melee and AOE poison damage. If you want to win this fight easily, it is recommended to equip some necessary items that can offset this damage by spending some Diablo 4 Gold. Vesicator After slaying the first wave of Frothers, Vesicator will make an appearance in the form of a giant, hulking monstrosity of muscle and tentacles. You may encounter it on the radar of “The Heart of All Rot” quest. This monster is particularly excellent at attacking with its tentacled arms, which causes poison damage. In addition, it can also summon annoying Regurgitator minions to help him deal with some troubles. Awoken Dead On the way to complete “Fundament of Faith” mission, you can find this short and fat horror in Forgotten Chamber. In addition to some basic attack damage, Awoken Dead is also equipped with overwhelming lighting attacks to cast fatal damage. And Shambling Corpses will occasionally appear to help this boss. Ah Bulan, Mender Of Veils You may be surprised and astonished as you see this boss. Ah Bulan, Mender of Veils, is one of the most memorable bosses in Diablo 4 Vessel of Hatred DLC. You will meet this four-legged beast in Spirit Realm in the period of accomplishing “Across the Threshold” mission. Armed with a spear and shield, Ah Bulan is good at both offense and defense. He is available to cast stomping attacks and has two powerful clones accompanying him to provide assistance at any time. Eidolon Of Julian Eidolon of Julian is encountered in the quest of “Living Memory”. After searching Buried Chamber, you are required to fight with this towering red spirit. Eidolon of Julian can summon mini-tornadoes that are designed to significantly hinder player eyesight while caught inside. Urivar In the questline of “Burning Crusade”, players are going to descend into Knight’s Encampment dungeon where nestles Urivar. Urivar is an armor-clad boss who excels in melee attacks. He also has his army of knights to summon. Priestess Of Hatred Priestess of Hatred nestles in a befouled Clearing in Hierophant Pyre. You are needed to defeat her in “The Way Out Is Through” mission. She features A vicious, grotesque monster. Despite its size, it moves and attacks pretty quickly. Of particular note is blood magic, which features a powerful beam that shining the battlefield. Dread Captain Players will come to Seta O-Akha in the period of completing “In His Footsteps” mission. You will then engage in a fight with Dread Captain. With a massive pillar holding in his hand, Dread Captain primarily attacks with ice damage. In addition, there will be a Water Watcher that casts poison attacks from distance to support Dread Captain. Harbinger Of Hatred In the end, here comes the last boss in Vessel of Hatred DLC - Harbinger of Hatred. And you witness the strength of it during finishing “All Good Things” mission in Domain of Mephisto. Harbinger of Hatred features A malevolent dragon-like entity. During the fight, waves of enemies will appear in a small arena. This demon has 2 stages. It is recommended to use Akarat’s buffs to effectively resist. Harbinger of Hatred, as the ultimate boss, is inherently challenging. If you are absent of defensive skills or builds that can keep you alive or heal, then it is recommended to lower the difficulty to World Tier 1. Also Read: Long-Term Diablo 4 Promotions & Giveaways - Real And Valid That’s all about all the bosses in Vessel of Hatred expansion. If you want to learn more, you can enter iGMeet discord, where offers tons of beneficial gifts from time to time in its Giveaway channel. Thanks for reading.Nov-03-2024


